
 Home
What's New
Home
What's New
 User Manual
 1. Introduction
2. Basic Uploads
3. Config Params
 4. Advanced
5. International
6. File Downloads


 Chapter 4: Advanced Features
4.1 Event Handling
4.2 Customized Progress Bar
4.3 Using XUpload as a Server Component
4.4 Using XUpload from VB
4.5 Accessing Selected Files
4.6 Shell Extension Discontinued
XUpload fires events on every major occasion such as the beginning and end of an upload, addition and deletion of files, sorting, errors, etc. With the help of JavaScript, your web page can handle some or all of the events. The following example replaces the default Reply from the Server message by handling the ServerReply event:HTML:
<script type="text/javascript" for="UploadCtl" event="ServerReply(result)">
alert( "Reply from the server was: " + result );
</script><HTML>
<BODY><OBJECT WIDTH=500 HEIGHT=200
ID="UploadCtl"
CLASSID="CLSID:E87F6C8E-16C0-11D3-BEF7-009027438003"
CODEBASE="XUpload.ocx">
<PARAM NAME="ViewServerReply" VALUE="False">
<PARAM NAME="Server" VALUE="localhost">
<PARAM NAME="Script" VALUE="/xupload/uploadscript.asp">
</OBJECT></BODY>
</HTML>The following code sample uses the DropFiles event to start an upload automatically when files are dragged and dropped on the control from Windows Explorer.
The DropFiles event handler must exit immediately to unfreeze Windows Explorer. That is why we cannot just call UploadCtl.Upload directly, but instead use setTimeout to schedule this method call at a short delay (200 milliseconds).
HTML:
<script type="text/javascript" for="UploadCtl" event="DropFiles(HowMany)"> // Handle the DropFiles event. We must exist immediately
// to unfreeze Windows Explorer, that's why we use
// a trick with setTimeout to trigger an uploadsetTimeout( UploadCtl.Upload(), 200 );
</script>
...
Click the link below to run this code sample:
http://localhost/xupload/04_dragdrop.asp

The next section of this chapter demonstrates yet another application of the XUpload events: a customized progress bar.
Click here for the full list of XUpload events.
By tapping into the UploadProgress and WaitingForReply events, you can implement a DHML-based customized progress bar which will reside on the same page as the control itself. The following code sample demonstrates a simple custom progress bar:HTML:
<script type="text/javascript" for="UploadCtl" event="UploadProgress(FilePercent, OverallPercent)">
if( OverallPercent > 0 )
{
ProgressTable.width = 500 * OverallPercent / 100;
}
</script><script type="text/javascript" for="UploadCtl" event="WaitingForReply()">
ProgressText.innerText = "Waiting for reply...";
</script><script type="text/javascript">
function Stop()
{
UploadCtl.Stop();
ProgressTable.width = 1;
}
</script><OBJECT
classid="CLSID:E87F6C8E-16C0-11D3-BEF7-009027438003"
codeBase="XUpload.ocx"
height="200"
id="UploadCtl"
width="500"><PARAM NAME="Server" VALUE="localhost">
<PARAM NAME="Script" VALUE="/xupload/02_redirect_upload.asp">
<PARAM NAME="ShowProgress" VALUE="False">
<PARAM NAME="RedirectURL" VALUE="http://localhost/xupload/02_redirect_reply.asp">
</OBJECT><P>
<B><SPAN ID="ProgressText">Overall Progress:</SPAN></B>
<TABLE WIDTH=500 BORDER=1 CELLSPACING=0 CELLPADDING=0>
<TR>
<TD>
<TABLE BORDER=0 ID="ProgressTable" WIDTH=0 CELLSPACING=0 CELLPADDING=0 BGCOLOR="#FFFFFF">
<TR HEIGHT=15><TD BGCOLOR="#0000FF"></TD></TR>
</TABLE>
</TD>
</TR>
</TABLE>
<BR>
<INPUT TYPE="BUTTON" NAME="Stop" VALUE="Stop" OnClick="OnStop">
Click the link below to run this code sample:
http://localhost/xupload/04_progress.asp
4.3 Using XUpload as a Server Component
XUpload can be used as a server component within an ASP/ASP.NET environment. Just like any COM object, XUpload.ocx needs to be registered on the server using regsvr32. The ProgID to be passed to Server.CreateObject is "Persits.XUpload".To use XUpload from an ASP.NET application, the interop assembly XUPLOADLib.dll (shipped with the product) needs to be placed in the /Bin subdirectory of your application.
The following code sample uploads two files from one server (where XUpload is installed) to another (where file capture script is installed):
Server-Side VBScript:
<%
Set XUpload = Server.CreateObject("Persits.XUpload")
XUpload.Server = "localhost"
XUpload.Script = "/xupload/02_redirect_upload.asp"' Select two arbitrary files for uploading
XUpload.AddFile Server.MapPath("01_simple.asp")
XUpload.AddFile Server.MapPath("01_simple_upload.asp")' Upload
XUpload.Upload' Display results
Response.Write XUpload.ServerReply
%>C#:
<%@ import Namespace="System.IO" %>
<%@ import Namespace="XUPLOADLib" %><script runat="server" language="C#">
void Page_Load( Object sender, EventArgs e)
{
XUPLOADLib.IUploadCtl XUpload = new XUPLOADLib.UploadCtl();// Specify server and script
XUpload.Server = "localhost";
XUpload.Script = "/xupload/02_redirect_upload.asp";// Select two arbitrary files for uploading
XUpload.AddFile( Server.MapPath("01_simple.asp") );
XUpload.AddFile( Server.MapPath("01_simple_upload.asp") );// Upload
XUpload.Upload();txtResult.Text = XUpload.ServerReply;
}</script>
<form runat="server">
<asp:Label id="txtResult" runat="server"/>
</form>
Click the links below to run this code sample:
http://localhost/xupload/04_server.asp
http://localhost/xupload/04_server.aspx
To include XUpload in your VB project, run Visual Basic, open or create a project, then go to Projects/Components. Check the box next to Persits Software XUpload Control, then click OK. The control's icon (a blue dotted square) appears on the VB Toolbox.Use XUpload as you would any VB control. XUpload's properties can be set using VB's standard Properties panel, or XUpload's custom property sheet. The latter can be invoked by right-clicking on the control and selecting "Properties" from the context menu or double-clicking the word (Custom) in the VB Properties panel.
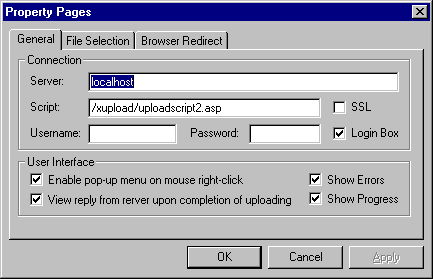
The property sheet can also be invoked programmatically by calling the DisplayProperties method.
XUpload allows programmatic access to currently selected files via the SelectedFiles property. This property returns a collection of SelectedFile objects, each representing a file item on the list.The SelectedFile object supports the following properties: Index, Path, Size, and Selected, which return the file's 0-based index, path, size, and highlight status, respectively.
With JavaScript, a for loop should be used to iterate through the collection. Use UploadCtl.SelectedFiles.Count to determine the total number of items in the collection.
JavaScript:
function UploadOnClick()
{
for( i = 1; i <= UploadCtl.SelectedFiles.Count; i++ )
{
myFile = UploadCtl.SelectedFiles(i);
alert( myFile.Path );
}
}The SelectedFile object supports several other properties that are specific to the XDownload control (described in Chapter 6).
4.6 Shell Extension Discontinued
We have decided to discontinue supporting the Shell Extension functionality starting with Version 3.0 onwards.
Copyright © 1998 - 2010 Persits Software, Inc.
All Rights Reserved.
XUpload™ is a trademark of Persits Software, Inc.